In Excel OLE automation I used a worksheet's Shapes.AddPicture method to add a picture and a worksheet's Shapes.AddShape method to add a shape of a certain type (e.g. msoShapeTrapezoid).
How do I do these things in FlexCel?
Pictures can be added with AddImage, and as always APIMate will show you how.
Adding Shapes with the API is not yet supported, but you can InsertAndCopy a shape from other file: so you can have some predefined shapes stored in a file, and add them to your working file.
I add an image from file. In Excel Automation I can pass -1 for width and height to the AddPicture method, since width and height is unknown without inspecting the file further. In FlexCel, I have to determine width and height by loading the file into a TGraphic first. Could FlexCel support -1 for width and height, too, if the image is read from a file?
Futhermore, it seems that AddImage ignores the LockAspectRatio property of the TImageProperties object passed to AddImage. That is, my image is stretched according to the cell range of the anchor even if LockAspectRatio is true.
Hi,
The main issue to support that is that when reading from a file, FlexCel doesn't really load the image anywhere, so it doesn't know its size. In some of the platforms we support there is no real way to get the image size from the platform, so you need to tell FlexCel what the image sizes are.
To get the size of the image, you can use a TUIImage. And you can insert the TUIImage directly, without specifying height and width. For example:
img := TUIImage.FromFile('test.png');
try
  xls.AddImage(2, 3, img);
finally
  img.Free;
end;
Note that this code will also work correctly in High DPI (like a 200% screen scaling) if the image has correct dpi saved inside, while taking the size from a TGraphic won't.
If you want to calculate the image width and height to pass to other overload, you could use this:
function GetImageProperties(const xls: TExcelFile; const row, col: integer; const filename: string): IImageProperties;
var
  imgHeight: Int32;
  imgWidth: Int32;
  Img: TUIImage;
begin
  Img := TUIImage.FromFile(filename);
  try
    imgHeight := Trunc(((Img.HeightInPoints * 96.0) / 72.0));
    imgWidth := Trunc(((Img.WidthInPoints * 96.0) / 72.0));
    Result := TImageProperties_Create(
              TClientAnchor.Create(TFlxAnchorType.MoveAndResize, row, 0, col, 0, imgHeight, imgWidth, xls),
              '');
  finally
    Img.Free;
  end;


end;
And pass those properties to AddImage.
About LockAspectRatio, I think you are misunderstanding its use. What LockAspectRatio means is that Excel won't let you change the aspect ratio from the UI, not that the image can't be stretched. You can easily see it from Excel: Add an image, stretch it, and then right click properties and set "Lock aspect ratio" to true. You will see the image is still stretched, but if you try to resize it Excel will keep the aspect ratio as you resize the image with the mouse.
First, thank you for the code determining width and height of an image.
Now to the LockAspectRatio issue: From another post I found that I can change the properties of the added Image using the SetObjectProperty method.Which shape options do I have to use to set the width and height of the image? Or, how do I determine the width and height of a cell or cell range so that I can use then as width or height for the added image?
The width and height of the image are not part of the ShapeOptions, they are the ShapeAnchor. To change them you would use SetObjectAnchor instead. But there is no need to change it, since the AddImage() calls that take a IImageProperties parameter allow you to specify the anchor when adding the image (IImageProperties has an Anchor property).
So what you need is to calculate the correct TClientAnchor in order to pass it to the AddImage properties. In the code from my last post, we calculated it here:
TClientAnchor.Create(TFlxAnchorType.MoveAndResize, row, 0, col, 0, imgHeight, imgWidth, xls)
This is one of the ways to create a client anchor, by specifying the starting row and column, and then the width and height of the image. But there are other ways to create the ClientAnchor, which take only rows and cols. Internally, all images are stored in the xls file as (row1, col1: row2, col2), so the constructor that takes an image width what it does is to calculate the ending row and columns and store that.
You can create a TClientAnchor to get the size of the cells. For example, the following code should take a row and 2 columns, and insert the image between the first and the start of the last column, adjusting the height so the image is not distorted.
function CalcImgSize(const xls: TExcelFile; const row1, col1, col2: integer; const filename: string): IImageProperties;
var
  imgHeight: Int32;
  imgWidth: Int32;
  Img: TUIImage;
  CorrectedImgWidth, CorrectedImgHeight: Int32;
  hCells, wCells: double;
  Anchor, FinalAnchor: TClientAnchor;
begin
  Anchor := TClientAnchor.Create(TFlxAnchorType.MoveAndDontResize, 1, 0, col1, 0, 2, 0, col2, 0);
  Anchor.CalcImageCoords(hCells, wCells, xls);
  Img := TUIImage.FromFile(filename);
  try
    imgHeight := Trunc(((Img.HeightInPoints * 96.0) / 72.0));
    imgWidth := Trunc(((Img.WidthInPoints * 96.0) / 72.0));


    CorrectedImgWidth := Round(wCells);
    CorrectedImgHeight := Round(imgHeight * wCells / ImgWidth);


    FinalAnchor := TClientAnchor.Create(TFlxAnchorType.MoveAndResize, row1, 0, col1, 0, CorrectedImgHeight, CorrectedImgWidth, xls);
    Result := TImageProperties_Create(
              TClientAnchor.Create(TFlxAnchorType.MoveAndResize, row1, 0, col1, 0, FinalAnchor.Row2, FinalAnchor.Dy2, col2, 0),
              '');
  finally
    Img.Free;
  end;


end;
And you can call it this way:
xls.AddImage(filename, CalcImgSize(xls, 2, 3, 7, filename));
Note that the code above is a little more complex that it could be, creating 2 TClientAnchors (it could be done only with 2), but this is to account for rounding errors when in high dpi mode. You can also easily change it if what you want to specify is 2 rows and a column and have the last column be calculated automatically.
Ok, thank you very much.
Adrian,
When I try the code you posted, it works well as long as I don't change the Default RowHeight property of the excel sheet. The picture is show distorted (width is correct, but height is not proportional to width any more)
Same problem when I change the font and size of a column (the row height then gets adjusted as well so the problem seems to be related to the previous one).
Is there nay solution?
Are you changing the row height before or after adding the picture?
In the code above we used TFlxAnchorType.MoveAndResize which as it name implies, resizes the image when you resize the rows (making them look distorted). Same happens in Excel if you add an image, set its properties to Move and Resize, and then resize the rows.
Can you try with TFlxAnchorType.MoveAndDontResize instead and let me know if the problem persists?
I change the row height before adding the picture.
Changing the anchortype to MoveAndDontResize does not solve the problem.
Changing the rowsize after adding the picture yields the same result (with both anchortypes).
Changing the rowsize afterwards in Excel itself back to the default value resizes the distorted picture to its correct dimensions. Apparently the picture is added with anchor values calculated from the default row height and not from the actual row height at the time of insertion?
If you are changing the default row size, are you setting:
xls.DefaultRowHeightAutomatic := false;
after changing it?
I've tried it here and I can't really make it produce distorted images.
My example app is here:
http://www.tmssoftware.biz/flexcel/samples/image_aspect_ratio.zip
I even try changing the row after the image is inserted, and as it is MoveAndDontResize, it doesn't resize. (under the hood FlexCel is calculating the image size before resizing the row, then resizing the row, then recalculating the new ending row with the row size changed)
Note also that in the code above there were 2 MoveAndDontResize which had to be changed to MoveAndResize.
Do you think you can modify the example app I attached to show what you are seeing?
Thanks for the sample project. I searched a while comparing it to my own project and found out when the problem arises. I changed your code to the following code :
// Added from
if FileExists('....\testresult.xlsx') then begin
xls := TxlsFile.Create(True);
xls.Open('....\testresult.xlsx');
end else begin
// Added to
    xls := TXlsFile.Create(1, TExcelFileFormat.v2016, true);
    xls.NewFile;
end;
try
// Added from
for i := xls.SheetCount downto 1 do begin
if (CompareText(xls.GetSheetName(i),'Report') = 0) then begin
xls.ActiveSheet := i;
xls.DeleteSheet(1);
Break; // Exit for loop
end;
end; // for i := 0 to xls.SheetCount-1...
xls.InsertAndCopySheets(0,1,1,xls); // Create 1 new sheet and insert at the front
xls.ActiveSheet := 1;
xls.SheetName := 'Report';
// Added to
xls.AddImage(filename, CalcImgSize(xls, 2, 3, 7, filename));
xls.Save('....\testresult.xlsx');
finally
xls.Free;
end;
The code to resize the rows was removed, it has nothing to do with the problem.
I added code (between "add from" and "add to") to open an existing excel file, and when the file already contains a sheet "Report", it is first removed, a new one is inserted and renamed to "Report" so we have a clean sheet.
If you run the program a second time (so that testresult.xlsx already exists and has a sheet "Report") then the image that is added is distorted. If I remove the line that inserts a new sheet, then there is no problem any more.
I also remarked that on inserting the new sheet, not only the image is distorted but also the global column width of the sheet is different from the default width of the other sheets (which is not the case testresult.xlsx is newly created). There is however no code that changes the column width of the sheet.
Inserting a new sheet in an existing file is the cause of the distortion. Can you explain this behaviour? Am I perhaps inserting sheets the wrong way?
Hi,
Just to make sure we are speaking about the same issue, I don't see an aspect ratio distortion when I run your modified app, only that the plane is bigger. (but aspect ratio is still ok)
If that is the issue then the problem is that the files have a different "normal" style.
When you do:
TXlsFile.Create(1, TExcelFileFormat.v2016, true);
This creates a file with a default font of Calibri 11. But older files (Excel 2003 or older, also the files FlexCel creates if you do TXlsFile.NewFile ) have Arial 10 as default font.
The column widths in Excel are measured in "how many "0"s can you fit in the column, on the normal font". So if you can fit "00000" in the column, the column has a width of 5.
But of course, if the normal font in one file is different from the other, the width for "5" will be different.
This is not really FlexCel related, it happens in Excel also without using FlexCel at all.
In your case, the code you added:
xls := TXlsFile.Create(1, TExcelFileFormat.v2016, true);
xls.NewFile;
Is redundant: The first line:
xls := TXlsFile.Create(1, TExcelFileFormat.v2016, true);
Is equivalent to:
    xls := TXlsFile.Create(true);
    xls.NewFile(1, TExcelFileFormat.v2016) ;
So what the code is doing is creating a new file with Excel 2016 format (calibri 11 is the default font), but then forgetting that file and creating another with Excel 2003 file format (arial 10 is the default font):
    xls := TXlsFile.Create(true);
    xls.NewFile(1, TExcelFileFormat.v2016) ; //creates a file in excel 2016 format.
    xls.NewFile(1)  //same as xls.NewFile(1, TExcelFileFormat.v2003) ;  creates a file in Excel 2003 format.
So yes, the columns will look different when you copy the sheet from one file to the other, and in fact, if you look at the column headers, you'll see they are in different fonts:
Excel 2016:

Excel 2003:
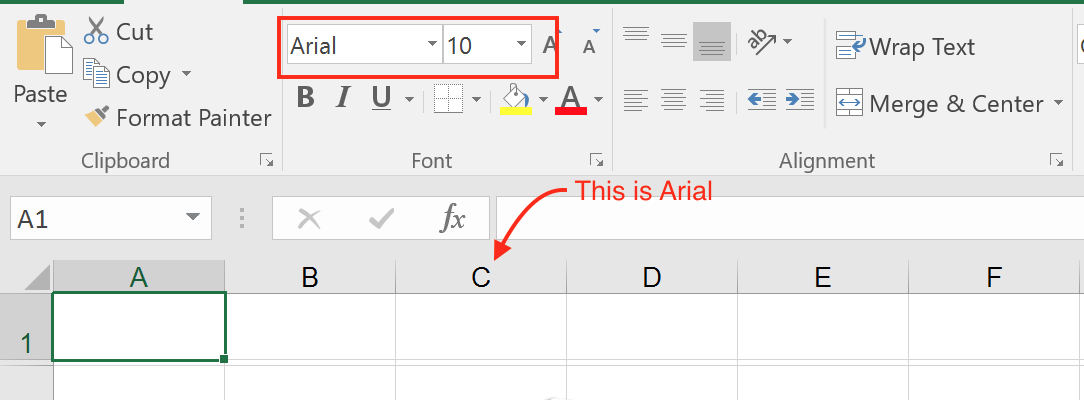
If you look for example at the "C" header, you'll see that those C's are in different fonts.
But maybe you can see it more clear if you change the default to some fancy font, like for example:
You'll run into this problem whenever you insert a sheet from a workbook with one default font into another with another default font: The default font is one for all the workbook, so you can't have one sheet with a default font arial and the other with default font calibri. What happens is that the sheet changes the default font when copied, and it will look different when put into the other workbook. (no matter if you do the copy with Excel, FlexCel, or whatever)
But I am not 100% sure this is your issue, since the code you sent was copying into the same workbook (and working fine here, only that the image was bigger because the default column width in Excel 2003 is bigger)
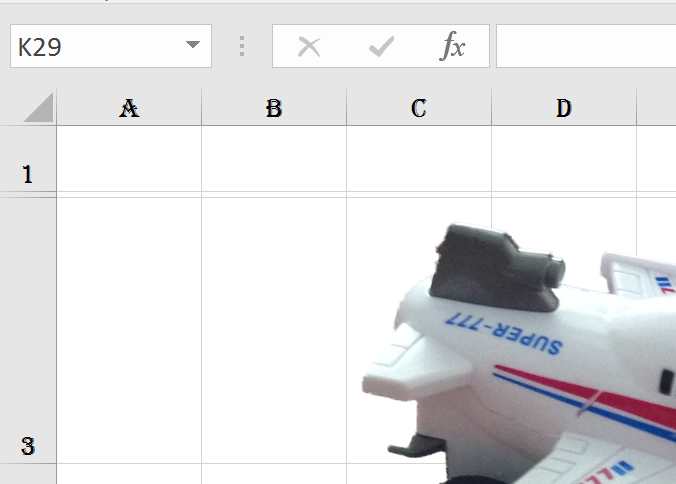
Weird that you don't see any aspect ratio distortion. I my case, if no xls file exists, the picture is inserted with dimensions 7,51x8,47cm (aspect ration ok). If I rerun the program while the xls file exists, the picture is inserted with dimensions 5,16x6,77cm (should be 6,02x6,77cm). I also noticed that in the first case the font in the file is arial 10 (excel 2003 default) and the column width is 10,71. In the second case, the font is still arial 10 but the column width is 8,43. I noticed that the latter is the default column width when the font is calibri 11. Somehow a mix with these values occurs which causes the distortion.
I could solve the problem however using your hint. Using the same file format for opening/creating excel files solves the problem. Is there any way however to get to know the excelfileformat of the file you are opening or is it sufficient to test for the extension : .xls is v2003, .xlsx is >= v2007 (to open with which file format then?)
I encountered still a last peculiarity. If you set the row height to a different default value, I encountered again a (little) distortion of the inserted pictured with some row height values and no distortion with other row height values. It turns out that setting the row height results in a small calculation where numbers are truncated. F.i.
xls.DefaultRowHeight := Round(1120); // Results in a row height of 10.50 (14 pixels)
xls.DefaultRowHeight := Round(1220); // Results in a row height of 12 (16 pixels)
xls.DefaultRowHeight := Round(13*20); // Results in a row height of 12.75 (17 pixels)
What happens afaik is that the values you try to set (11-12-13) are multiplied by 4/3 (=96/72) and then get truncated to get a integer value in pixels.
The calculation of the the image positions (dx1,dx2,dy1,dy2 : see code) however is done using the original row height you tried to set (11-12-13) instead of the real row height (10.50-12-12.75). This causes distortion for setting the row height to 11 and 13 but not for setting it to 12. In this case you better use 11.25 (instead of 11) and 13.5 (instead of 13).
I just wanted this to share with others since it caused me some trouble to find out what was wrong.
Thanks a lot for your support. It is fast and very helpful!
FlexCel does have a "FileFormatWhenOpened" which will tell you the file format of the opened file, but this won't probably help in your case. The thing is: Files generated by Excel 2007 or newer (both xls or xlsx) have a different default column width, and a different "Normal" style (which uses Calibri instead of Arial).
So you can create a file in Excel 2016, which will have FileFormatWhenOpened = Excel2016, but with Normal style with Arial 10. What really matters is not which Excel version created the file, but which style you have for normal.
You can manually change the normal style in Excel by right clicking in "Normal", then Modify in the home tab of the ribbon:

And you can read or modify the normal style with FlexCel too (ApiMate shows how to do it). The actual version of Excel doesn't really matter, what matters is the font you get in
xls.GetDefaultFormatNormalStyle
If you get a default Excel 2016 column width with a default Excel 2003 normal font, maybe you are changing the normal style with FlexCel? (note that APIMate shows the code to change the normal font, so if you pasted some APIMate code, maybe you could have pasted the code that changes the normal font)
About integer rounding errors, indeed this might happen: Excel stores discrete values in the column and row sizes, and you can get into rounding errors when modifying the heights and columns. It happens also with Excel alone (no FlexCel involved), and even if you change the screen scaling. (For example, if you save a file in Excel at 100% screen scaling and then change the scaling to 200% and open the file again in Excel, you will see that all column widths are slightly different. Hell, even if you do a print preview, take a screenshot, then superimpose that screenshot with the screenshot of the normal view, you will see the widths aren't the same. (everything using just Excel, no FlexCel at all). FlexCel always uses the "Print preview" widths, but even that changes from printer to printer. We tested about a dozen of real different physical printers when looking at the best number we could find to convert between the Excel internal units and some inches. Every printer printed a slightly different column width, when you measure the printed paper or just put one peace of paper over the other. So you just have to live with some little (and sometimes not that little) inaccuracies.